Quick start
Get from a new workspace to your first assessment in about thirty minutes.
Online version, always current: https://cloudvision360.com/docs/platform/quick-start/
This walks through the fastest path from an empty workspace to a first set of findings. It assumes you are an owner or administrator.
1. Sign in and set up access
Sign in to your workspace. New to the layout? Find your way around takes two minutes. If your organization uses single sign-on, connect it now (OIDC or SAML) so your team signs in with your identity provider. Otherwise, invite your first administrators and make sure multi-factor authentication is on. Review the built-in roles and assign the least privilege each person needs.
2. Connect a cloud, read-only
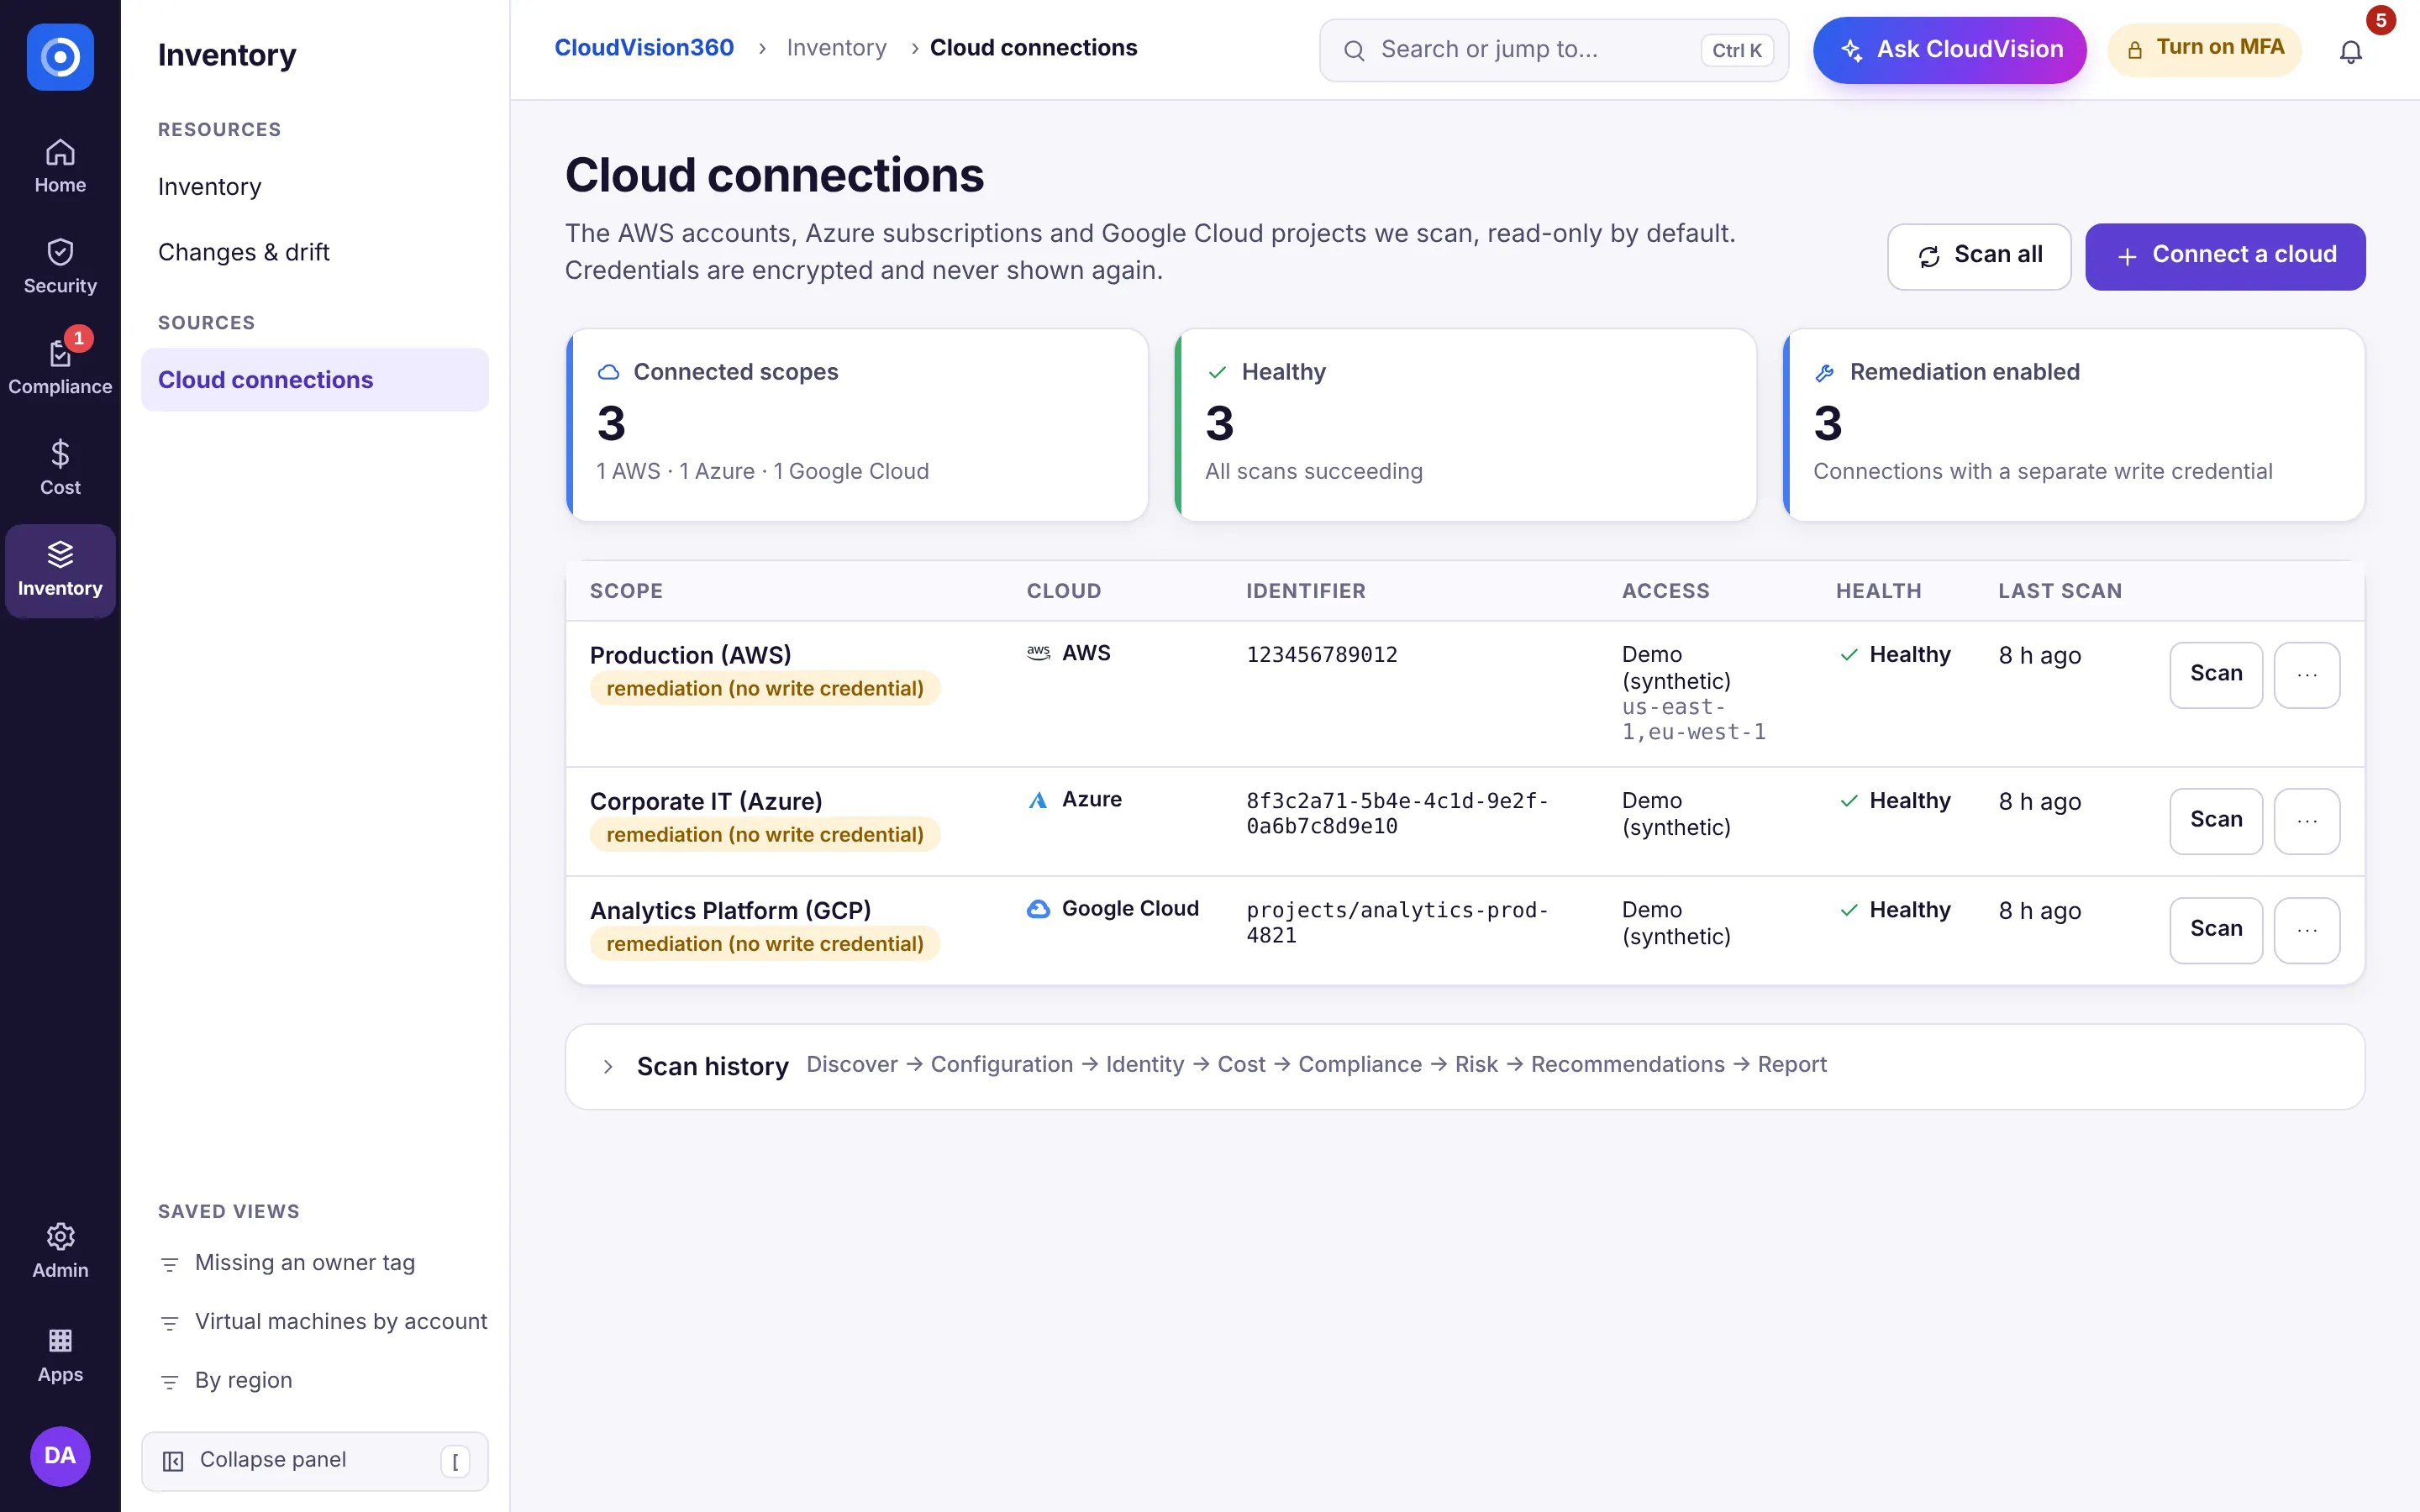
Connect one cloud account to start, from Inventory → Cloud connections → Connect a cloud (or type “connect” in jump-to, Ctrl+K). CloudVision360 only needs a least-privileged reader role, and the Terraform module for each provider shows exactly which permissions it requests and why.
3. Run the first assessment
The first scan runs automatically once a connection is live. In a few minutes an eight-stage scan builds your inventory, posture findings, identity risk, Zero Trust and compliance scores, cost and savings.
4. Work the Fix first list
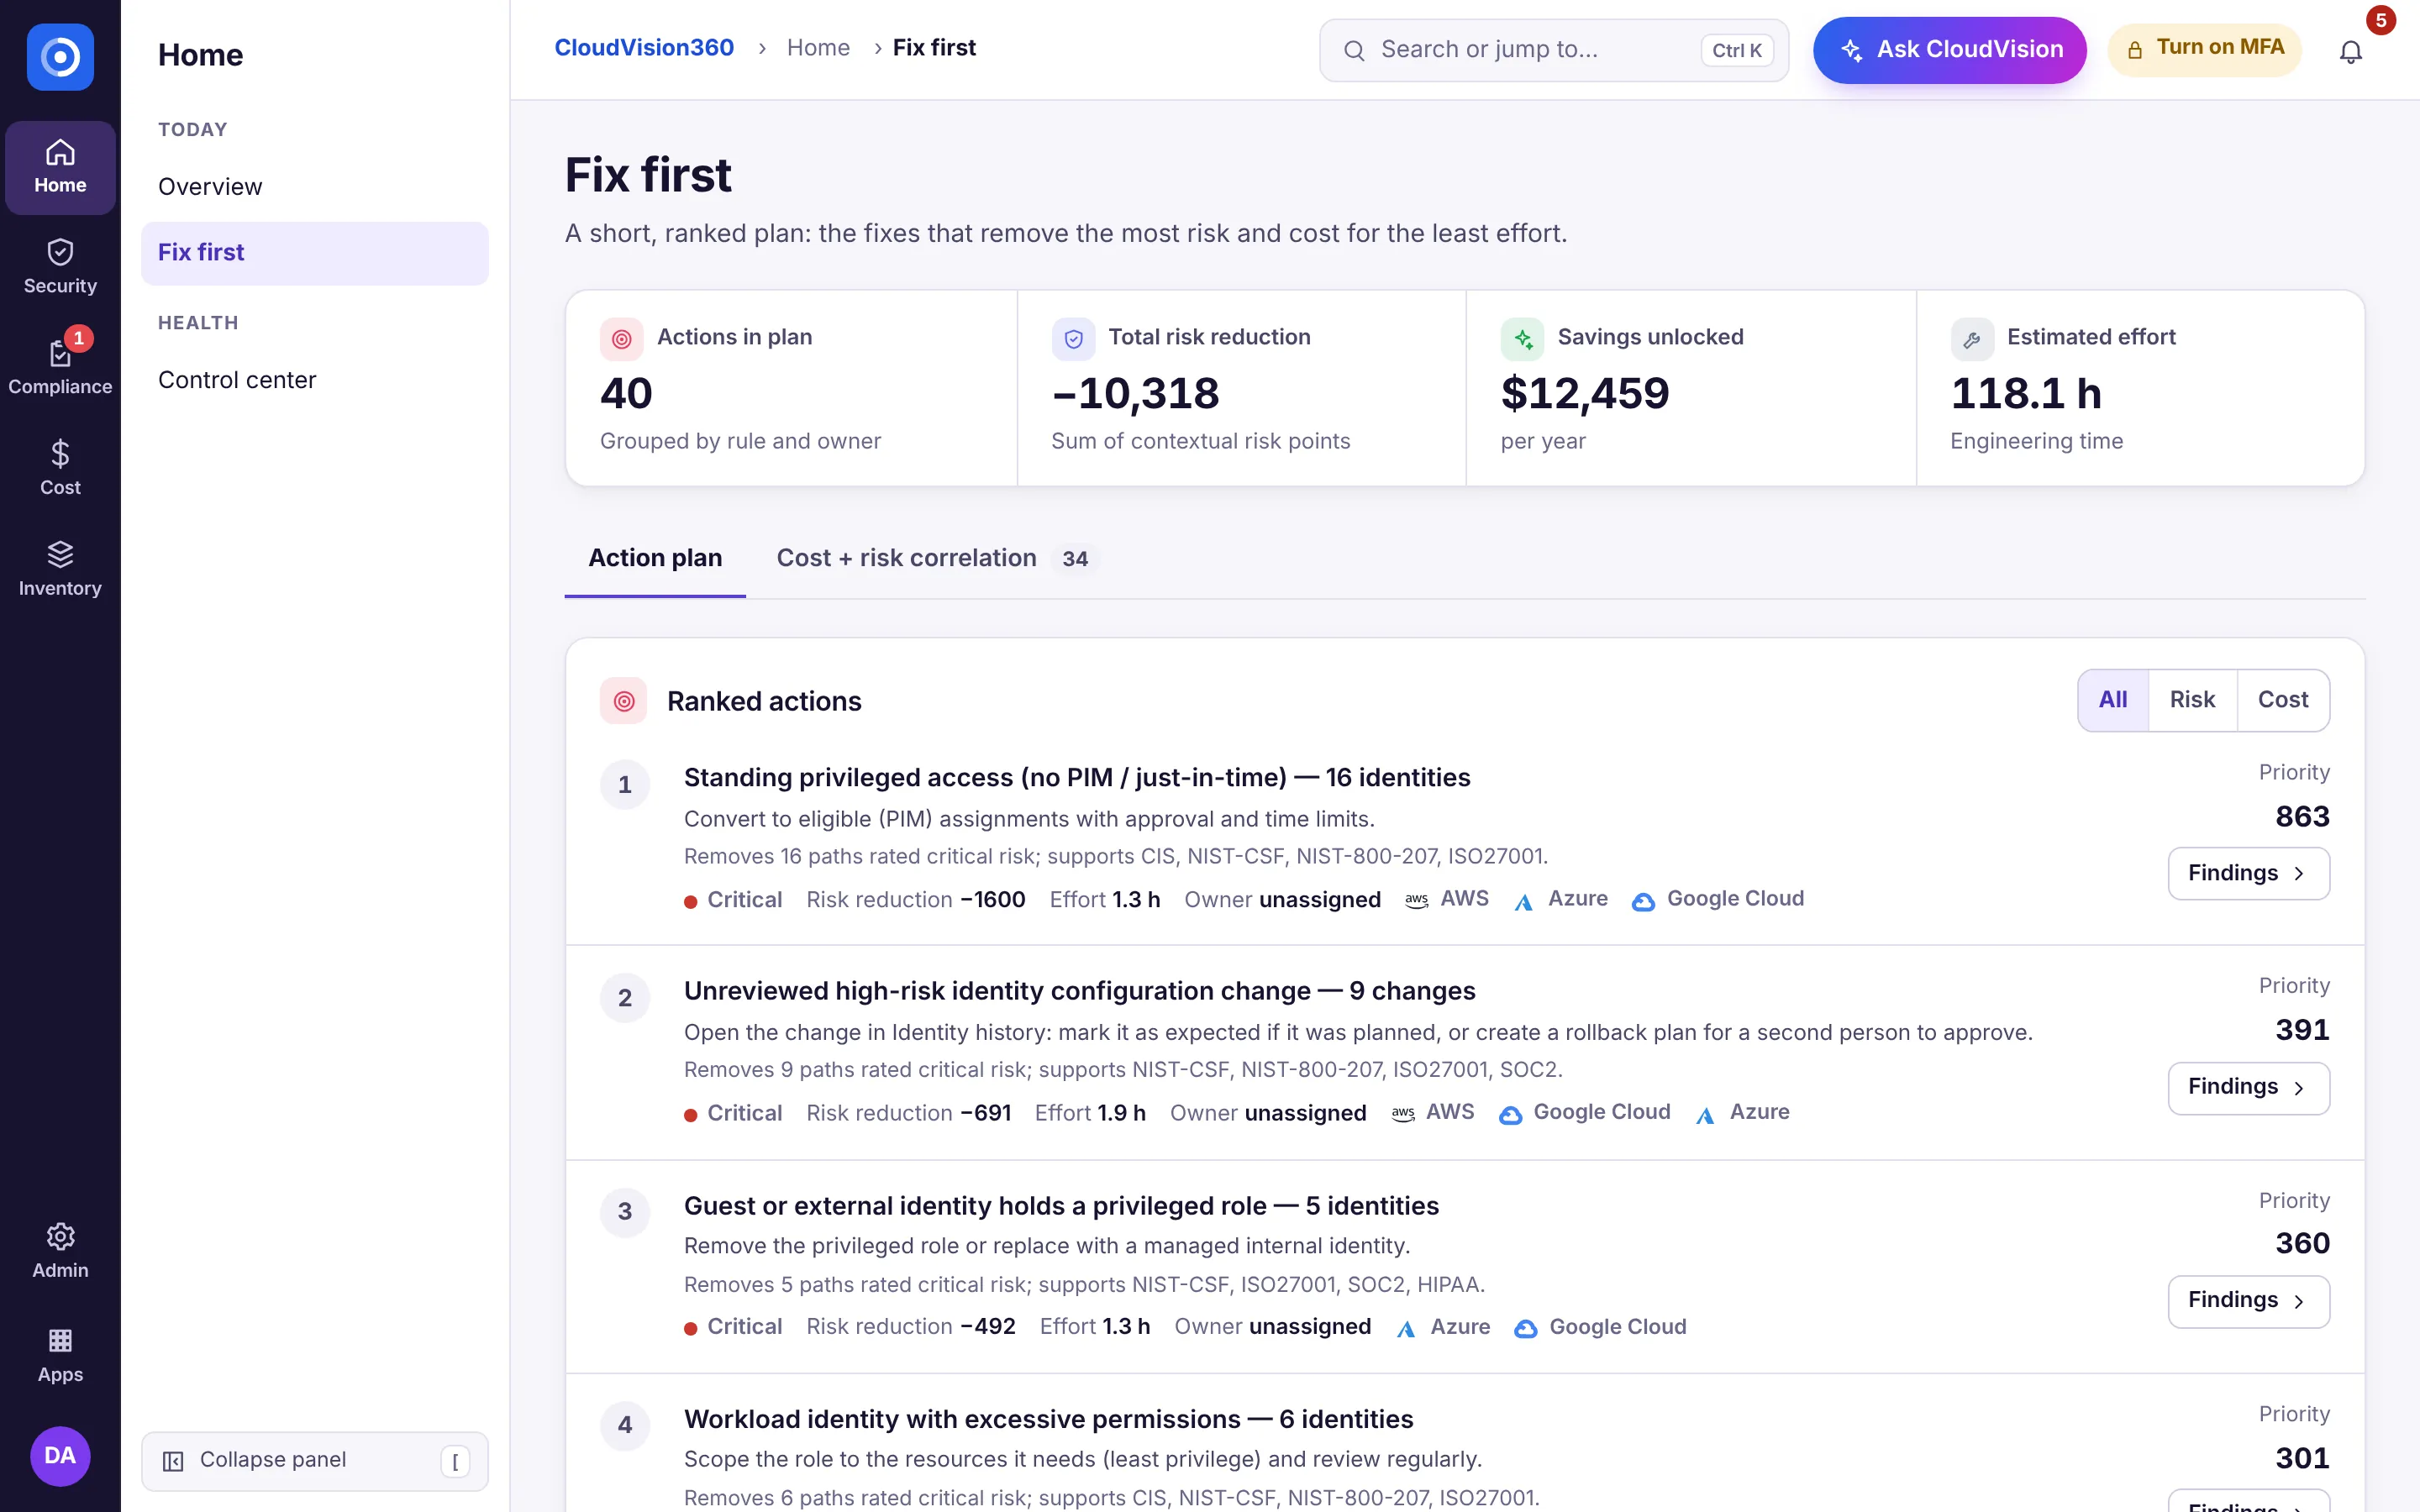
Open Fix first (Home hub, in the section panel). It ranks work by risk and cost together, and each item explains why it matters, who owns it and what it takes to fix. Start at the top.
5. Turn on the rest when you are ready
Want one screen across products? Build a custom dashboard in the portal, or ask Vision Agent.
Everything else is opt-in: notifications and ITSM, governed remediation, scheduled reports and more. Add them as you need them.